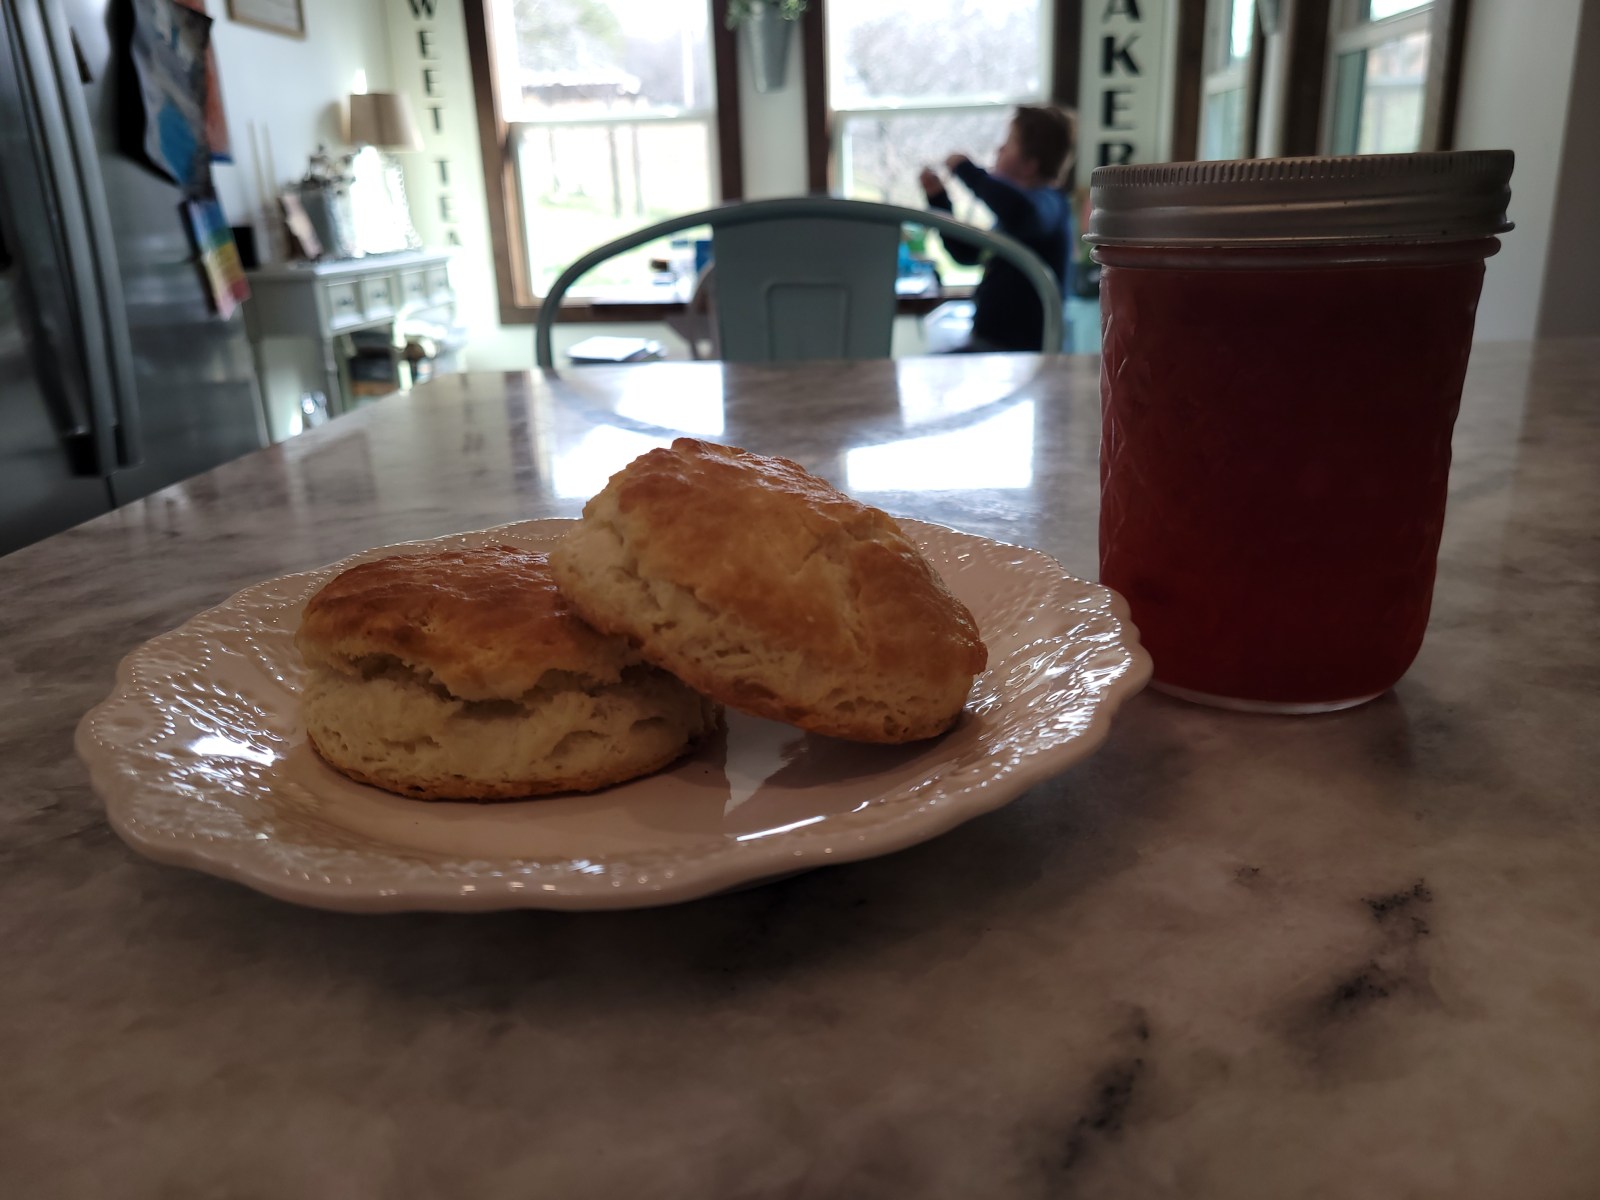
Who doesn’t love a fluffy biscuit with their breakfast? That soft fluffy inside, with a lite crispy crust on the bottom, cut open and smothered with homemade strawberry freezer jam or honey.
Not a breakfast eater? Maybe you love that soft fluffy center and crispy crust with a warm hearty stew for dinner.
No matter how or when you like to eat them, a well-made biscuit can really hit the spot!
For years, I let the idea of making a good biscuit intimidate me. I knew no matter what I did, my biscuit could never live up to that of my mom or my grandmother.
But I didn’t give up! After several tries, testing different recipes, and perfecting my own, I have finally figured out how to make the easiest and best biscuits.
This recipe has three simple ingredients. That’s it! Just three. Plus, it only takes about 20 minutes to make from raw flour to finished biscuits.
With that kind of time, you can make dinner that includes a great biscuit and still have time to throw in some laundry, walk the dog, or put your feet up for a minute.
Step One
Preheat your oven and get out all your ingredients. While this recipe is simple, you never want to start a recipe before you make sure you have everything you need. There’s nothing worse than getting part of the way in and realize you don’t have all the ingredients.
Preheat your oven to 450 degrees farenheight.
You will need:
2 cups of Self Rising Flour plus more reserved for working your dough
1 whole stick of salted butter plus 2 table spoons reserver for buttering the biscuit tops
Approximately 1cup of milk
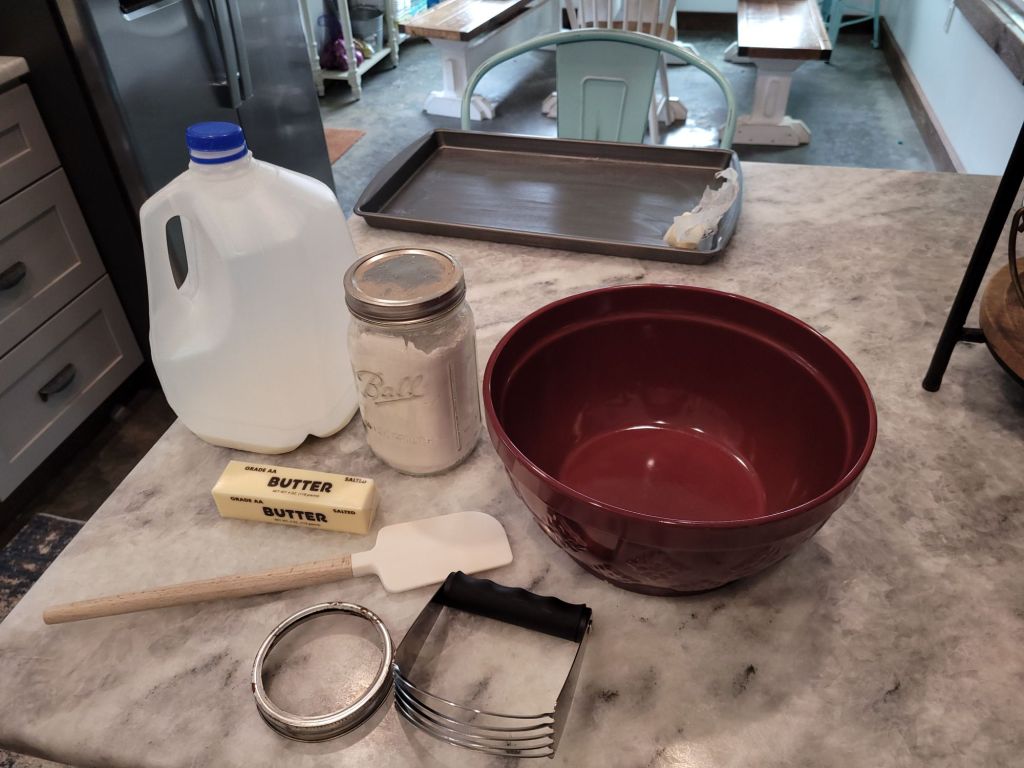
You will also need to gather some tools:
A large bowl
A pastry cutter or fork (you will use this to cut the butter into the flour)
A knife to cut up your butter
A fork, spatula, or spoon to stir in your milk
A rolling pin
A biscuit cutter or a Mason jar ring (that’s what I am using)
A pan to bale your biscuits on
Step Two
Start by putting self rising flour into your bowl.
If your flour has some clumps in it, just give it a quick stir with a fork or a quick sift with your fingers (make sure your hands are clean). There is no need to fully sift the flour to be fine and lump free. After all, we are about to add butter to make it lumpy again.
Step Three
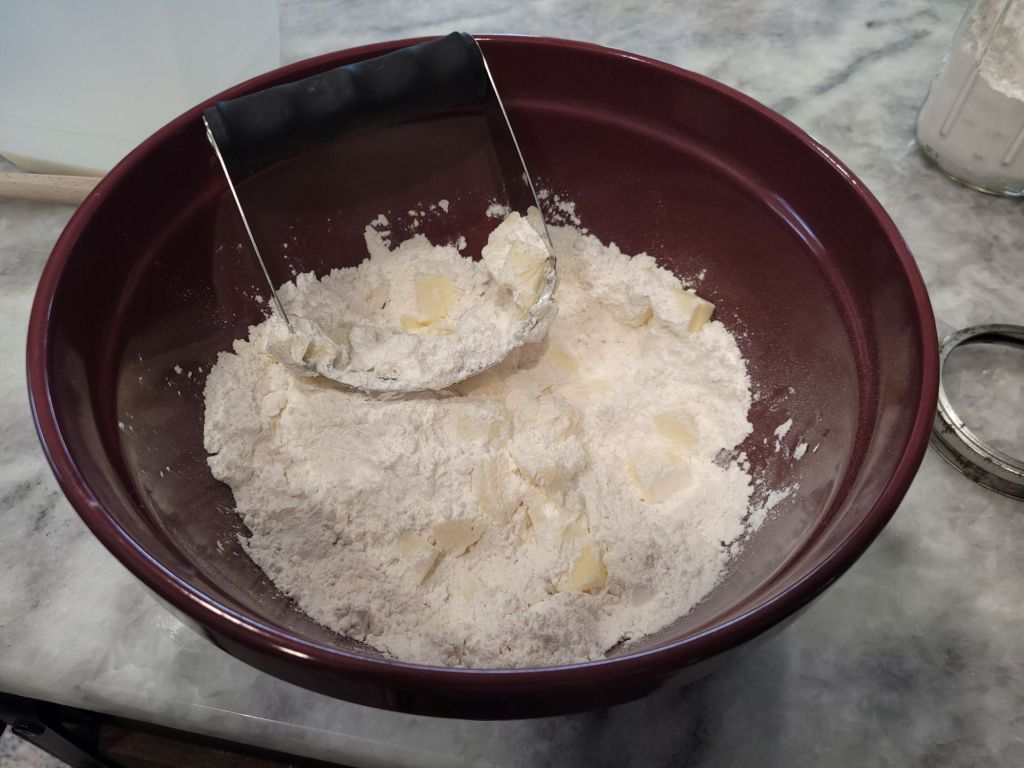
Cut your butter into small chunks.
This is really important! Leave your butter in the fridge until you’re ready to use it. You want it to stay as cold as possible.
If your butter is soft, you will end up with more of a crumbly batter consistency than a dough.
Once you cut your butter into chunks, throw those little morsels of fatty goodness into the flour bowl.
Step Four
Using your pastry cutter, work your butter into the flour. You will have to stop and pull the butter off the cutter a couple of times before it is incorporated.
It is possible to do this with a fork, and some people even use their hands. I have tried both methods and have never gotten my texture right.
My advice is to invest in a pastry cutter. They cost less than $10, and if you’re going to make biscuits a lot, it’s worth it!
You want to work the butter just enough that the flour looks like a good crumble, and it’s the butter is only slightly sticking to your cutter or fork.
Step Five
SLOWLY incorporate your milk.
You don’t want to add too much and make your dough too wet. It is better to add a little and stir, add a little and stir, than to add a lot, and have to add more flour to dry your dough out.
The type of milk you use is your choice. Some people are hard core old fashioned biscuit purists and swear to only use butter milk. Some people use whole milk. I just use the regular 2% milk I have in the fridge.
Does buttermilk give your biscuit that special southern twang? Your bet it does! But it’s not a make or break on how your biscuits will turn out. Regular milk will work just fine.
If you are using a full fat milk like whole milk or buttermilk, you may want to lessen your butter from one stick to six tablespoons.
However, if like me, you’re using 2% milk, you want the whole stick to get that extra fat content.

Step Six
Sprinkle your counter or work area with self rising flour. This will prevent your dough from sticking to your counter.
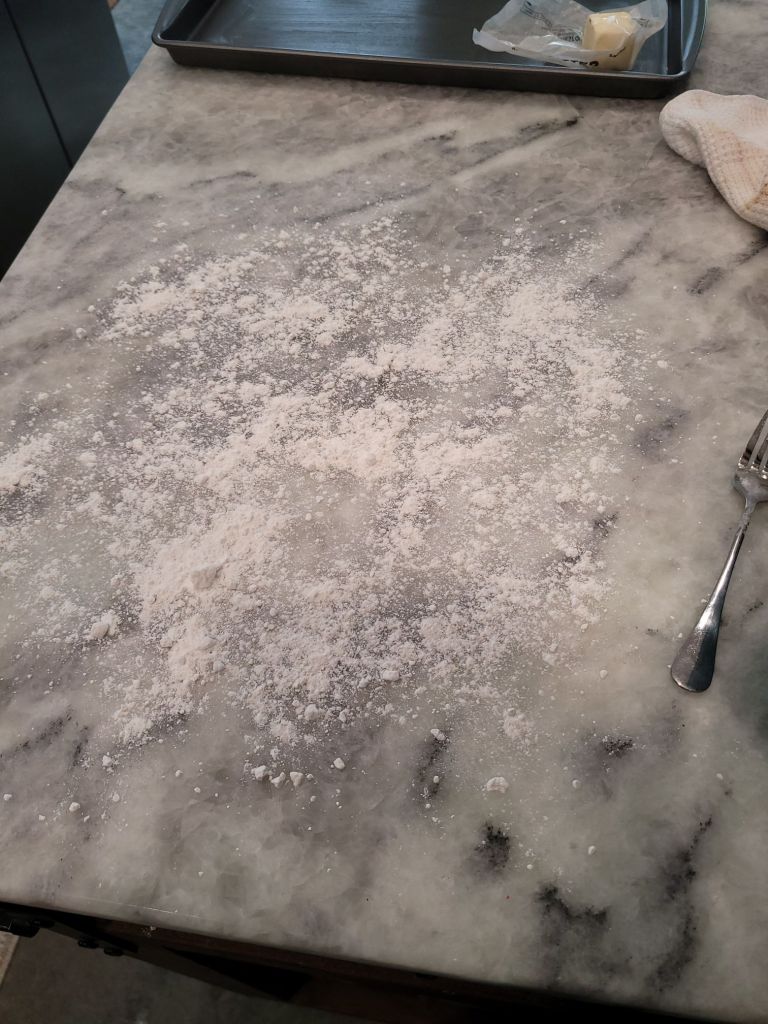
Then turn your dough out on your work surface, and sprinkle it with more flour so you can touch it to knead it.
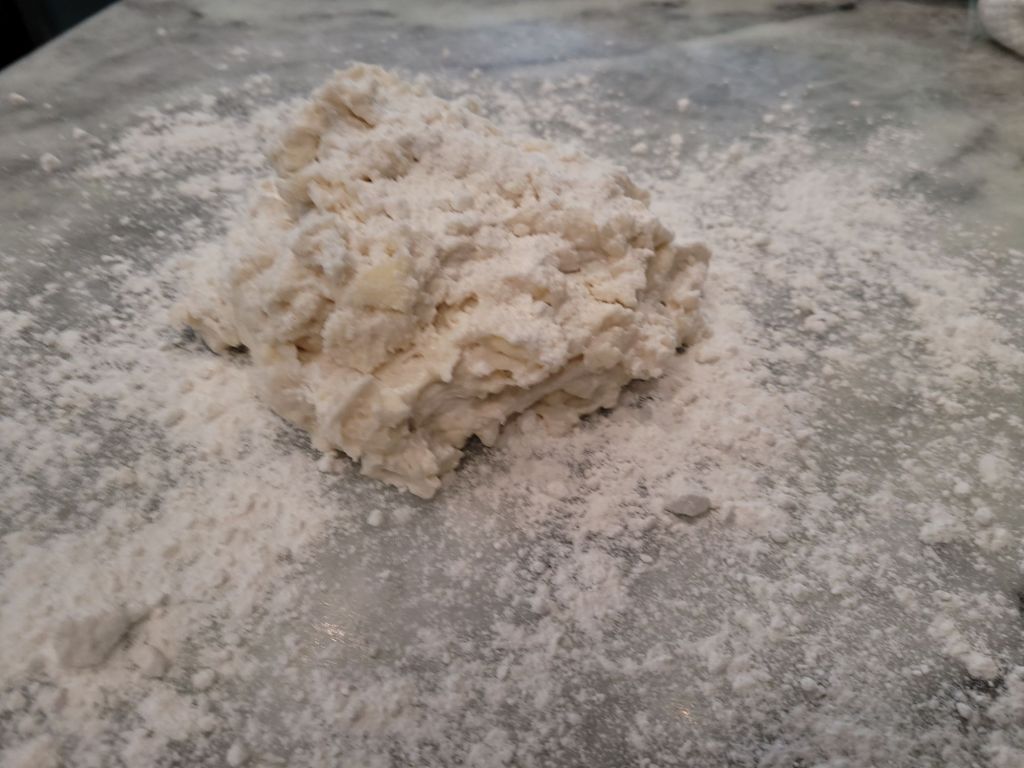
Next, knead the dough a few times until it is no longer sticky to touch.
You may have to sprinkle it with flour a couple of times while you need it to dry it out to make it not sticky. That’s ok! Just sprinkle a little at a time. Dont go over board! A little flour goes a long way.
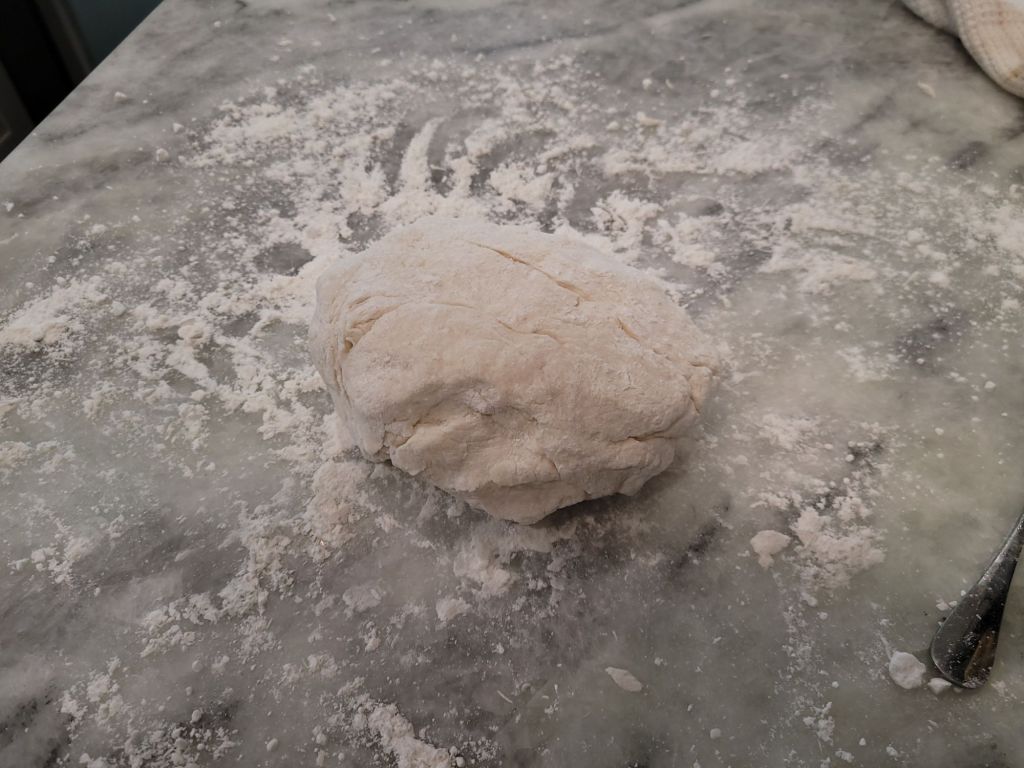
Knead the dough just until it’s not sticky and can make a nice dough ball.
Step Seven
Sprinkle your work surface with flour again. Using a rolling pin, roll your dough out flat. You want it to be as think as whatever you’re using to cut it with.
If your unsure how thick to roll out your dough, just put your cutter beside your dough as you roll it out. You can visually see when the dough is level with the top of the cutter.

When I cut my biscuits, I use a simple mason jar ring.
If I am making biscuits for a crowd, I will use a small mouth ring. Using a small mouth ring will yield you about 12 biscuits.
If I am just making them for my little family, I use a wife mouth lid. This yields about eight biscuits.
A wide mouth is a good middle of the road size biscuit. It’s not as big as a Cat Head biscuit, but it’s not a mini biscuit. It’s just right!
Step Eight
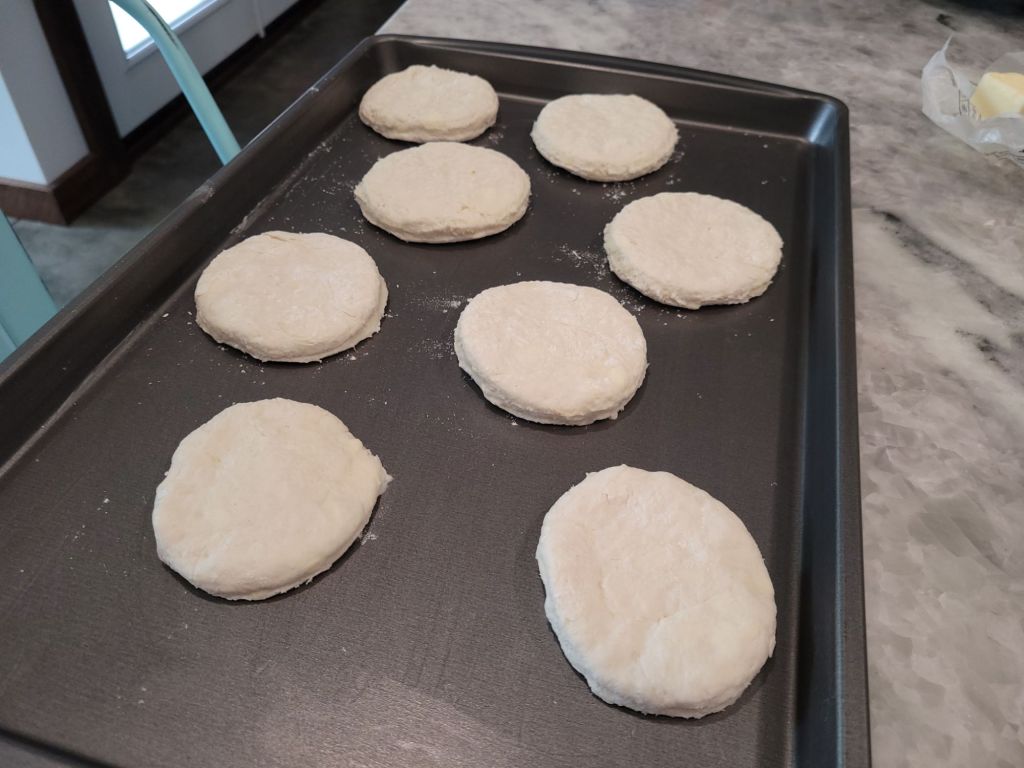
Butter your cooking pan, and get it ready to receive your biscuits!

Then, dip the edge of your cutter in the flour on your work space and cut the dough into circles.
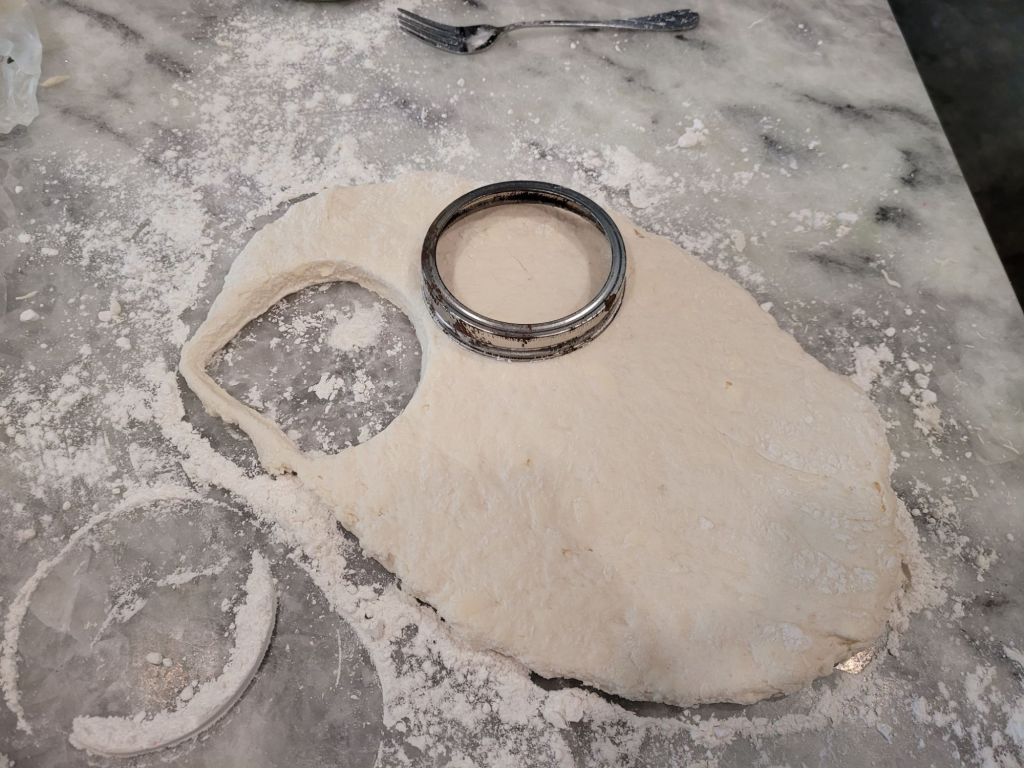
Once you have cut the circle, transfer your circles of doughy goodness over to your cooking sheet.
Step Nine
Place your biscuits in the oven and cook for approximately 15 minutes or until the biscuits are golden brown.
While your biscuits are cooking, go ahead and melt your two table spoons of butter.
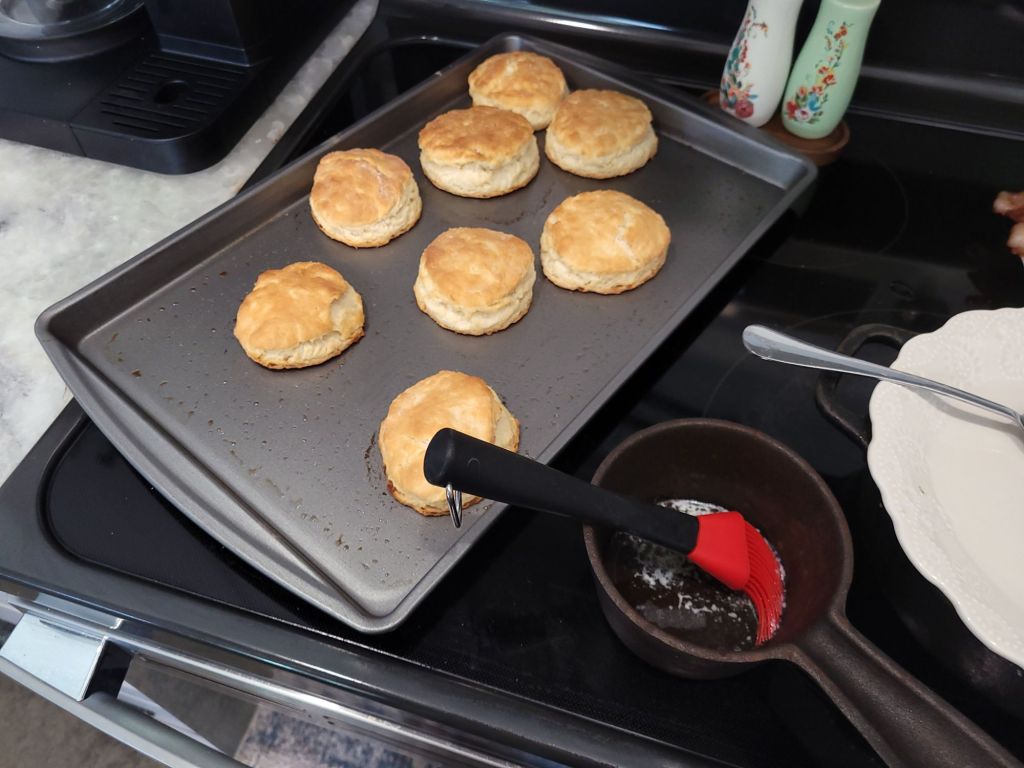
Step Ten
As soon as you take the biscuits out of the oven, drizzle the melted butter over the top of the biscuits. Just add a little! Adding too much will make your biscuit soggy.
Step Eleven
Enjoy!
Serve your biscuits warm with your favorite jam, breakfast meat, softened butter, or honey.

Can I keep my leftover biscuits?
Yes! Store at room temperature in an airtight container or well wrapped for about three days or in the fridge for up to five days.
How do I reheat my biscuits?
Preheat your oven to 375 degrees farenheight. Wrap your biscuits in foil and bake until they have reached your desired temperature.
Can I freeze my biscuits for longer storage?
Yes! If you have fully cooked them first, let them cool completely to room temperature. Next, put them in a freezer bag or vacuum bag and room as much air as possible. Freeze in the freeze.
When you’re ready to reheat them, sit them out for about 30 minutes to come to room temperature and then follow the reheating instructions above.
Can I freeze the dough?
Yes, you can. Follow all the steps to cutting the biscuits and putting them on the sheet. Then, place the sheet in the freezer for one hour to allow the dough to harden. Next, place the frozen dough in a vacuum bag or freezer bag and remove as much air as possible and freeze in the freezer.
To cook frozen biscuits, place biscuits on the cooking sheet for thirty minutes to thaw. Preheat over to 450 and cook until golden brown.
I will say, though, as quick and easy as this recipe is, you will be better off to make your biscuits fresh when you need them instead of making them ahead and freezing them.
I know reading this recipe may seem like a lot, but trust me! Once you do it once or twice, you will see what a breeze a good biscuit can be.
